I now had to flip over the boat. This action is turning out to be somewhat problematic since I can't do it myself. Because there are seldom any people around who could help me (or any people period) I have to time the "flipping" when my wife is around. The boat is getting a little heavier with each step, so I hope she can continue to help me with this.
This is the part where the grunt work really begins, I think. I couldn't reach the middle of the interior of the boat because the saw horses I have are too tall, so I had to cobble together a couple of supports that were no more than 18 inches or so high. I sanded the entire interior, then vacuumed the dust out. Fillets were applied to the joint between the bottom and number one panel. While the fillets were still wet I dropped in four pieces of fiber glass cloth, one in each of the four compartments separated by the seat supports. Straight epoxy is then applied to the cloth until it's pretty transparent. After it stiffens somewhat I trimmed off the excess cloth. This was a much more difficult job than fiber glassing the outside of the hull. In spite of thinking that I ensured the cloth was perfectly flat I had some bubbles under the cloth the next morning. I was able to push these flat because, luckily, the epoxy was still wet. I don't think they'll be too noticeable when everything is done. I filled in any remaining stitch holes that were open, then another layer of epoxy to the entire interior, wait, sand, vacuum, epoxy. I'll have to sand everything one more time in preparation for the varnishing before installation of the seats, but won't get it done this trip.
Another view after the third coat.
I test fit the seats and they went in place reasonably well, except for the stern seat. I'll have to deal with that next trip. I beveled the edges of the seats after the test fit and sanded everything smooth, especially the edges that will be visible.
Two coats of epoxy need to be applied to both sides of all seats.
Monday, August 23, 2010
The Skeg
The skeg is the "fin" in the bottom of the stern that helps the boat track properly. Installing it is a fairly straightforward procedure:
I've marked the skeg position and also where the four screws go. They are drilled from the top, then I went underneath to drill counter sunk holes.After making sure the skeg is plumb to the bottom, the surface of the contact points of the skeg and bottom are coated with epoxy thickened with silica, the skeg is applied in the measured position and then the wood screws are sunk from the inside of the boat into the skeg.
The "tail" was a little warped so I forced it into a centered position with duct tape.
A fillet of wood powder thickened epoxy is applied to the angle formed by the skeg and bottom.
There was quite a bit of rasping and sanding to get the "tail" to blend into the stern stem, but it turned out pretty well. Another strip of wood is tacked and epoxied to the bottom edge of the skeg (called a wormscrew) which will absorb most of the abuse and can be replaced if too worn, leaving the skeg unharmed. After some more sanding, etc. three coats of epoxy are applied.
Finishing the rails
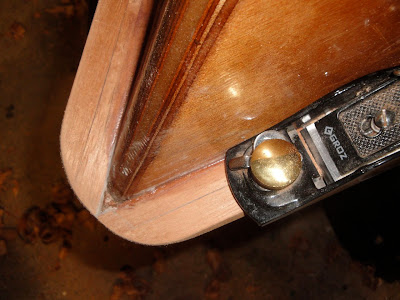
When I resumed work the first task was to finish the rails. Unfortunately I didn't take many pictures of this process. After practicing on scrap with my new router and 3/8" roundover bit, I more or less successfully added a rounded edge to the top of the rails. I used my sander to remove a few gouges, etc. Next (as seen in the photo) I planed the excess off the bottom of the outside rail to match where the inner rail was trimmed before installation. I wanted to stain the rails a dark walnut shade, so I proceeded to do that, applied a first coat of epoxy after letting the stain dry overnight, and then let the epoxy dry. You're supposed to sand in between the two to three epoxy coats. When I did that the stain started to come off in patches and looked terrible. I might have used the wrong type of stain. Anyway that meant re-sanding the entire rails AND the breasthooks which created another problem: the breasthook wood is not solid but laminated with different types of wood. After sanding the hooks for the second time I broke through the first lamination and I decided to sand the entire surface of the hooks to the same depth. This doesn't look as nice as I had hoped, but it's not terrible.Then two coats of epoxy was re-applied to the rails and hooks . . . a very frustrating experience, but I'm moving on.
Subscribe to:
Comments (Atom)


