Saturday, October 22, 2011

DONE!! (mostly)

After two years of work my Skerry is complete, except for a few hardware and rigging issues.  It's one of those things where you work and feel your way through an unfamiliar project until one day it hits you that you're finished, which is a very good feeling.  

My finished Skerry, as yet unnamed

View of the rudder assembly with blade in up position


Another view of the rudder showing the blade pull-down rope

The modified mast partner on the forward seat


Over the winter and next spring I will be working on rigging the balanced lug sail, yard and boom.  I'll post some new photos when she's launched.


Daggerboard and Rudder Assembly

Daggerboard after sanding
Drying varnish with shop lamps


Although very straightforward to construct, the daggerboard and kick-up type rudder assembly were the most time consuming parts of the sail kit.  The daggerboard was the simplest:  glue on handle cheeks, then feather leading and trailing edges with the sander.  Three coats of epoxy and three or more coats of varnish.  I decided to oil the handle which provides UV protection and feels better to the hand.

The rudder blade went in similar fashion:  feathering, epoxy, and varnish.


Rudder blade after sanding


Rudder blade pull up hole
 In order to bring the kick-up rudder blade back to vertical position a rope has to pass through the rudder head and be attached to the blade by means of a knot hole.  Following some advice on the CLC Builders' Forum I over-drilled the rudder blade knot hole and then filled it with wood powder epoxy, let it cure, then drilled the half inch hole through the epoxy.  This insures the wood around the hole doesn't deteriorate from water saturation.  Because I feathered the trailing edge of the blade above the hole position ( a screw-up on my part) I had to thicken and reshape the edge adjacent to the half inch hole with epoxy and then drill the quarter inch rope hole into the edge radial to the half inch hole.  Once again wood thickened epoxy comes to the rescue.

Glueing the rudder head
 The rudder head consists of two external "cheeks" and two internal pieces that form the rope channel.  All are glued together, epoxied and varnished.  The tiller fits on the top and at right angles to the head, glued then the contact is filleted with wood thickened epoxy.

Monday, September 26, 2011

Oars

All that had to be done with the oars was add the leathers which was a lot easier than anticipated.  


Mast, etc.

 Finishing the mast, boom and yard (for balanced lug) went pretty smoothly.  I made a couple of changes, though, from plan.  First, I was a little worried about the strength of the mast scarf joint so a couple of dowels were drilled and epoxied into the joint.


Because of the way I plan to rig the balanced lug, I decided to form a round rather than square mast, as supplied by CLC.  After some calculations I planed enough of the square corners and then the resulting angles off the mast to create a close approximation of a round mast.  I ended up with a little less than a two inch diameter, which may or may not be strong enough for 57 square feet of sail.  If it doesn't work (punt) there is a plan for making a more stout mast next year.


One thing I discovered was that the use of these V-shaped rests really help when planing and sanding to steady the spars.

No epoxy was applied to the spars.  When varnishing the spars they rested on a couple of half inch dowels to keep them off the bench.  That way I could varnish the entire spar at once instead of in two or three sessions.  Three coats of varnish and done.

A belated update

I've been working all year on the boat but have been remiss in updating this blog, so here is the progress I've made on my Skerry:


When I resumed work in the spring 2011 I finished sanding the epoxy coats on the interior and began to sand the epoxy on the exterior of the hull which proved to be a lot quicker and easier.


After sanding, I applied two coats of primer and then three coats of Interlux Brightsides paint to the hull, with sanding in between each coat.  I thinned the paint with 10% thinner, applied with a thin foam roller and tipped all bubbles with a foam brush.  This process seemed to work pretty well with minimal runs and brush marks.

I made the decision to purchase the sail kit, but decided to go with a balanced lug rig sail instead of the sprit sail.  For this configuration the sailmaker recommended that the sail be lowered on the mast and that the standard mast be raked 7 degrees aft to keep the sail CE directly above the daggerboard.


To accomplish that end I installed the mast step per plan, then designed a new mast partner on the forward seat lip, moving the hole aft about 1.2 inches which will rake the mast the required amount.  Once glued and screwed in place it's really solid.

Next I applied three coats of varnish to the interior.

Sunday, October 31, 2010

Seats are IN!


I was really dreading installing the seats because of what I thought were some wide gaps between the seats (especially the aft seat) and the hull sides.   I spent a lot of time trimming the seat supports and seat slots to try to minimize the gaps.


However, after weeks of agonizing over the issue, I found that mixing the fillet epoxy so it was really really thick was the answer.  This helped to hold it in place in the wider gaps until it hardened.  I got this trick off one of the online boat building forums, which are proving to be invaluable for the project.  In this case, many cooks enhance the broth.

 Next the boat was flipped over to make the fillets on the underside of the seats.  With almost all the basic components in place the boat is now approaching its full weight and feels very stiff.  Even though I didn't get as far in this project as I had hoped this year the impression of substance gives me a great feeling of satisfaction.


Shop lights keep things warm while the epoxy fillets cure.  It's getting down to the freezing mark at night now.  After about 24 hours of curing with the lights  we had an 18 hour power outage due to the  upper midwest "landicane".   I think (hope) that the curing had progressed enough that the cool off didn't cause any major problems.

It's not even making it to 50 degrees F. during the day.  My boat building season is drawing to a close.

So this is where things will end for the year, unless I order the sail kit and assemble some of it in the warmth of our Minneapolis townhome.  Next up for the hull in the spring will be sanding the exterior.

The Daggerboard Trunk


Finally!  With the help of friend and neighbor Dave the daggerboard trunk was installed.


.
Fitting some parts require more than one set of hands and the trunk is one of them.


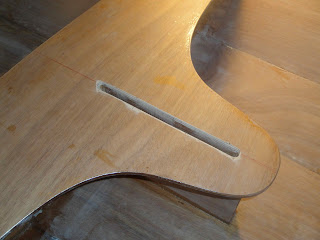
After the center seat was glued and filleted into place, I cut the hole for access to the trunk.  This was a second good excuse for buying my router.  The saw rasp trimmed the slot up along with my Dremmel.

A slot also needed to be cut in the bottom of the hull for the daggerboard using the same equipment.  

 You get one shot only so this was a little bit of a gut check to cut a hole in the hull I labored on for so long.

But all went well.  Skeg and daggerboard slot line up just like they're supposed to.